Introduction
In some circumstances, it may be worthwhile to keep a domain registered with Squarespace, while having Squarespace’s DNS servers changed to point to PlanetHoster’s. This can happen, for example, when you want to host your site and mailboxes at PlanetHoster while keeping your domain name hosted with Squarespace.
In this article, we’ll explain how to do this.
Prerequisites
- You must already have an account in the PlanetHoster DNS zone.
- Open your Squarespace account.
- If required, follow the instructions in the guide Changing your account and site language to choose English GUI.
How to Modify the DNS Servers
1. Open the Home menu in Squarespace and go to Settings > Domains:

2. Click on your domain managed by Squarespace:

3. Scroll down and click on Access DNS and nameserver settings (ADVANCED SETTINGS):

4. Click on the Nameservers tab:

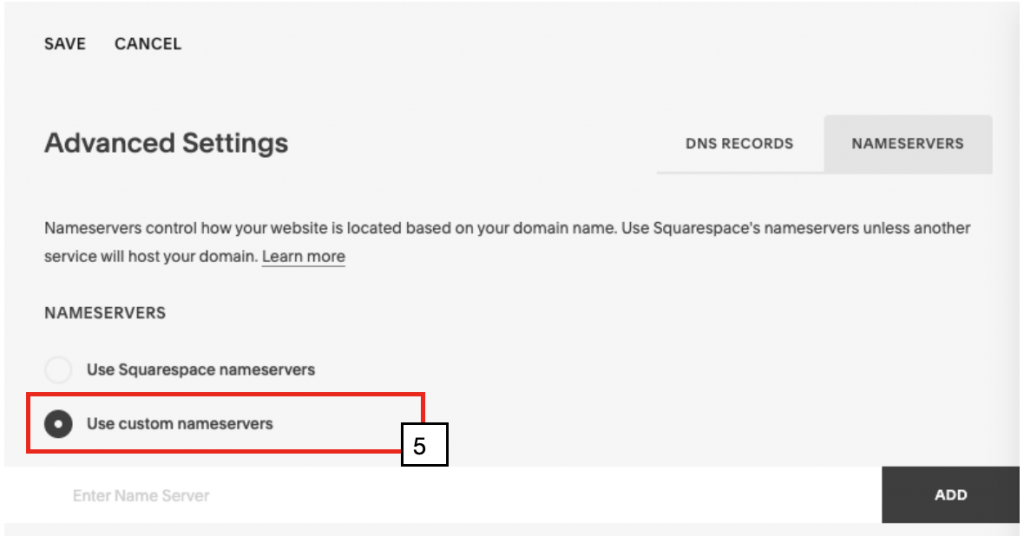
5. Click on the Use custom nameservers radio button:
6. Enter the PlanetHoster name servers directly into the Enter Name Server field. Click on the ADD button as you go:

The server names to be entered depend on the control panel. Here they are:
| Service | DNS name servers |
| The World with N0C | nsa.n0c.com nsb.n0c.com nsc.n0c.com |
| The World with cPanel | nsa.planethoster.net nsb.planethoster.net nsc.planethoster.net |
| HybridCloud dedicated servers (France) | hybridXXXX.fr.ns.planethoster.net hybridXXXX-1.fr.ns.planethoster.net |
| HybridCloud dedicated servers (Canada) | hybridXXXX.ns.planethoster.net hybridXXXX-1.ns.planethoster.net |
7. Click on SAVE.