Introduction
PlanetHoster now offers a VPN service. The following article will explain how you connect using your new VPN service. First and foremost, you will need your PlanetHoster VPN credentials. You will get these by email when you subscribe to the service. They are also available in your client interface, in the product section
Then comes the time to choose which operating system you want to use:
Windows
MacOSX
IOS (iPhone & Ipad)
Android
————————————————
Windows
A. Creating VPN Access (To be done only the first time)
1) Start by opening your “Network and Sharing Center” by right-clicking on the network icon in the taskbar.
2) In the “Network and Sharing Center” choose the option “Set up a new connection or a new network”.
3) Select “Login to your workspace” and click “Next”.
4) Select “Use my Internet Connection (VPN)” later.
5) In the field “Internet address” please enter the server address of your VPN namely “vpn.planethoster.net”. (You will find this information in your member area)
It is important to check the option “Do not log in now, but prepare everything for a future connection”.
Click on “Next”.

6) Enter your VPN credentials (user / password), choose “Remember this password” and click “Next”.

7) In the following window click on “Close”.

8) Return to the “Network and Sharing Center” and click on the “Change Map Settings” option.

9) In this window, go find the previously created connection (Named by default: VPN connection)
Right click it and choose “Properties”.

10) In the “Security” tab: change the VPN type to “Layer 2 Tunneling Protocol (L2TP) with IPsec (L2TP)”
Click “Advanced Settings” thereafter.

11) Choose the “Use pre-shared key for authentication” option and enter your “Pre-Shared-Key” type key.
Click “OK”

The initial configuration is done, now we will be able to connect to the VPN PlanetHoster.
B. Connecting to the PlanetHoster VPN Server
1) Return to the “Network and Sharing Center” and click “Change network card Settings”.
2) Double click on the VPN connection created in the previous section.
3) In the opened window enter your VPN credentials (user / password) and click on “Connect”.
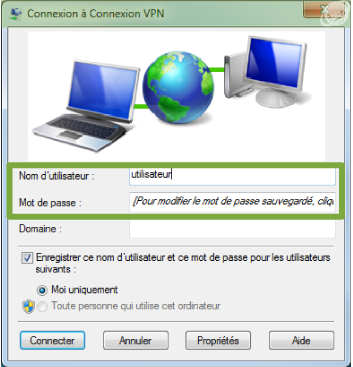
4) The connection should be made without any problem. If you have an error, please check your configuration

5) You are now connected on the VPN, you can check your IP at the top right of the site https://ns-lookup.io

* If Windows asks you to choose the type of network you are connected to, choose “Public Network”.

MacOSX
1) First go to system preferences:

2) Select the Network icon:

3) Click on the “+” sign at the bottom left of your network connections:

4) Choose a “VPN” interface of type “L2TP via IPSec” and name the service by “VPN – PlanetHoster”.

5) It is now necessary to enter the address of the server namely “vpn.planethoster.net” and your login ID that was sent to you by email.

6) In order to enter the “Password” and the “Shared Secret” it is necessary to press Authentication setting.

7) Finally it is necessary to indicate to the operating system that you want to redirect your traffic in the VPN via Advanced menu:

8) A small test via an internet browser will tell you your IP.

IOS (iPhone et iPad)
1) To begin, go to the “Setup” icon. VPN access (To be done only the first time)

2) Select the “General” tab.

3) At the bottom of this page, you will have a “VPN” tab.

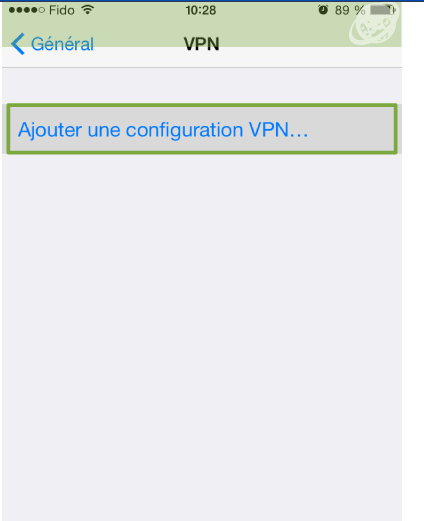
4) If you do not have a VPN connection yet, you will be asked to add a new configuration:
5) For the configuration, it is necessary to select L2PT in the type of connection, to register the name of the server: “vpn.planethoster.net”, the account is your identifier in my case “quentinc”, the password and the Secret which is also called in some cases the “Pre-Shared Key”, once registered you can validate the configuration.

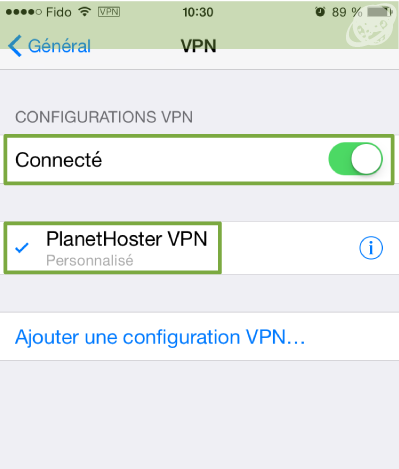
6) You can now tap or swipe on “Not Connected” to be “Connected” now, a small icon at the top should notify you that the VPN connection is successful:
7) A last little test on Safari to make sure that it works well:

Android
1) Select the “Settings” in your Android menu.

2) Under the category Wireless and Networks, click on the “more” tab

3) Once in the additional options, click on the VPN tab.

4) Click on the “+” icon

5) You will have to change the connection type later.

6) Choose L2TP / IPSec PSK. (Generally the first)

7) This will show you the next window. You must then enter the server name “vpn.planethoster.net” and the IPsec Shared Key that you have been provided with.

8) Enter your username and password.
