Contact points can be configured as subaccounts, which means that they have their own login information to the customer area and can perform various actions there based on the permissions they have configured. A contact point can also be used to hold your billing information and/or domain WHOIS information. To make a contact point’s information your billing information, you can update it on your “Profile” page. For domain WHOIS information, the use of a contact’s information is done at the time you place the order.
Prerequisites
Enter the following address in your web browser: https://my.planethoster.com.
Contacts/Subaccounts Interface Functions
By clicking on My Account -> Contacts, the following interface is displayed on the right of the screen:

| A | List of contacts | Contact list with the information needed for PlanetHoster to contact the people who own the sub-accounts. |
| B | Actions | Icons: – Edit to Edit contact that is selected. – Delete to remove the selected contact. |
| C | Add New Contact | Button giving access to the interface for creating a new contact, as explained in the Add New Contact paragraph. |
Edit Contact
- Locate the contact and click on the Edit icon:

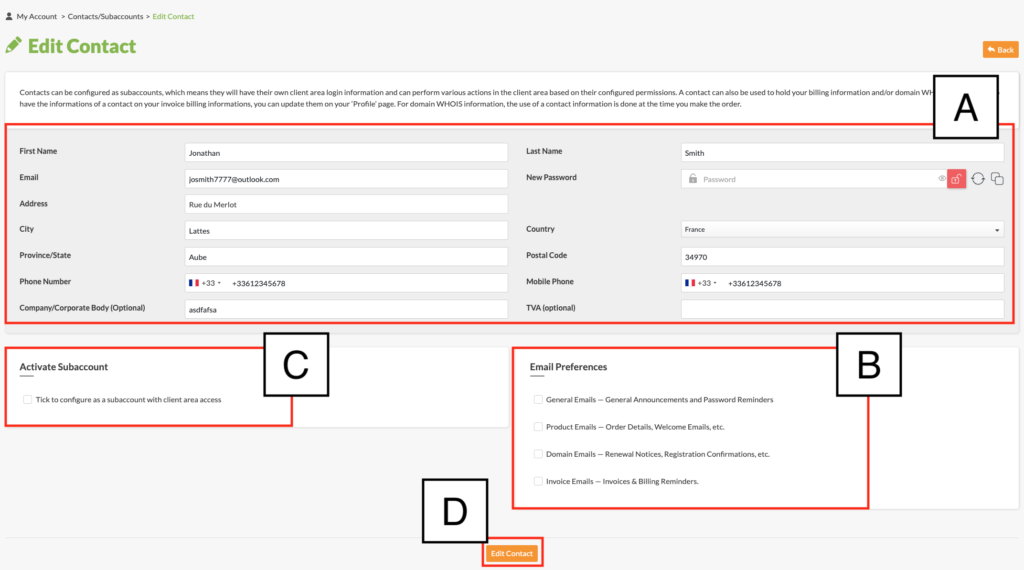
- Modify the desired information in the Edit Contact form:

| A | Main Informations | This part of the interface is used to provide contact details. |
| B | Email Preferences | Check the appropriate boxes to define which PlanetHoster e-mails should be forwarded to the contact. |
| C | Activate Subaccount | Check the Tick to configure as a subaccount with client area access box to define Sub-Account Permissions, as explained in the Activate Subaccount paragraph. |
| D | Edit Contact | Click on the Edit Contact button to save the modified information. |
Activate Subaccount
If you check the Tick to configure as a subaccount with client area access box, you can configure a sub-account with access to the customer area by checking the Sub-Account Permissions boxes:

Add New Contact
- Click on the Add New Contact button:

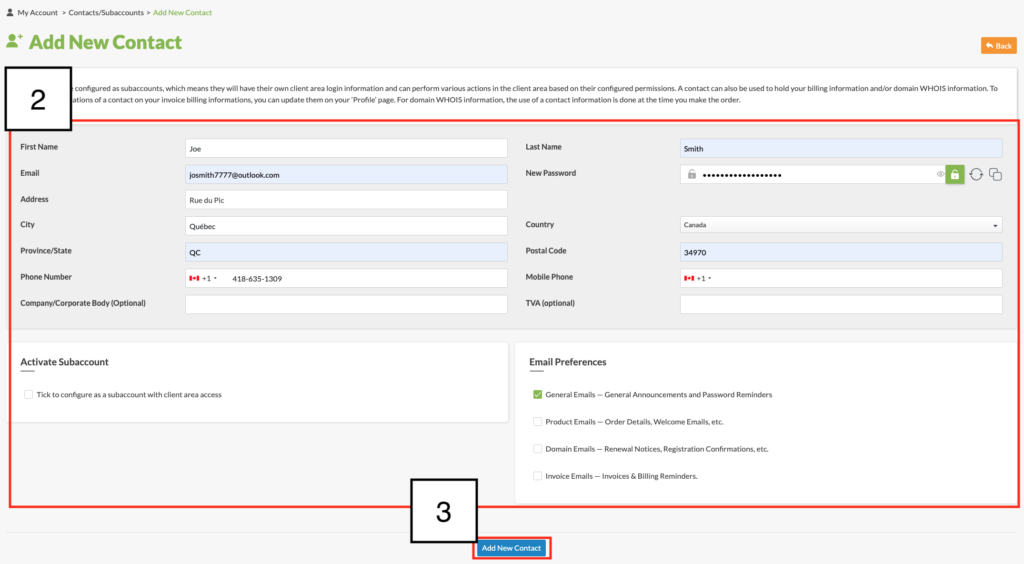
- Please fill in the required information (please refer to the Edit Contact section, as the definitions are identical):

- Click on the Add New Contact button to save the information.
Delete a Contact
- Locate the contact and click on the Delete icon:

- Click on the Delete button:

