The installation of a Let’s Encrypt SSL is automatic on all PlanetHoster server:
To validate a website, the internet authority Let’s encrypt sends an HTTP request to the domain.
The validation URL will have the following form: https://www.mydomdomain.com/.well-known/acme-challenge.
Once the automatic validation is complete, Let’s Encrypt will issue the SSL certificate. It will be installed automatically.
Installation from your cPanel:
1- Connect to your cPanel.
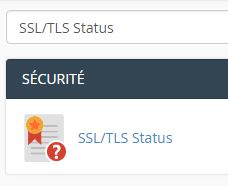
2- Find the tool “SSL/TLS Status” in the security section:
3- Select the domain on which you want an SSL Let’s Encrypt certificate to be installed and click the “Run AutoSSL” button:

Installation from WHM:
1- Connect to your WHM.
2- Find the username of the cPanel that is associated to the domain name you want to install an SSL on by going into “List account” section:

3- Search “Manage AutoSSL” into the search bar.
Select ”Let’s Encrypt – Current setting” and be sure to tick the ”I agree to these terms of service” box and finally save the change using the “save” button:

4- Please go to “Options” tabs and select “Allow autoSSL…”. Hit the save button:

5-Click on ”Manage Users” and enter the name of the user of your cPanel account (see step 2)> check ”Enable AutoSSL” and then the ”check” button:

6- For validation, it is possible to consult the logs in the “Logs” box:

if the installation has proceeded correctly, you will see a message like:
6:59:15 AM SUCCESS The system has installed a new certificate onto “cPanel_Name”’s website “Your_Domain”.
Sometimes there are .htaccess files that prevent the installation or renewal of the SSL certificate. The solution is to add this rule to allow the validation of the domain name into the main .htaccess:
RewriteRule ^\.well-known/acme-challenge - [L]