Introduction
It is recommended to use the nameservers provided by PlanetHoster (please refer to the article How to Modify the Nameservers of a Domain Name). However, if your goal is to have a white label solution and create your own nameservers, especially in reseller plans, it is possible to have custom DNS on the dedicated HybridCloud solution.
Prerequisites
Enter the following address in your web browser: https://my.planethoster.com.
Procedure
There are four steps to follow.
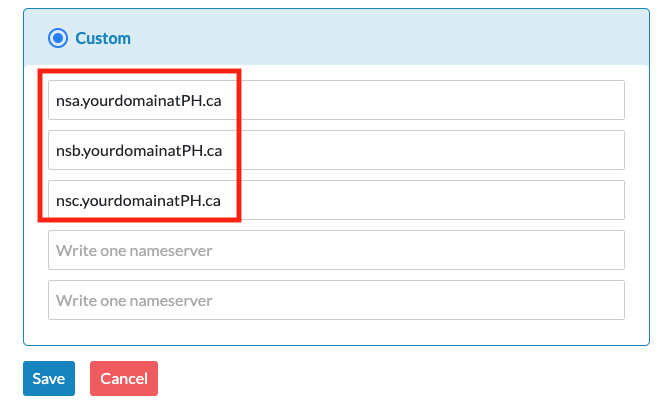
To clarify the procedure, we will use as an example a fictitious domain that we will call yourdomainatPH.ca. Your goal will be to have your name servers be:
nsa.yourdomainatPH.ca
nsb.yourdomainatPH.ca
nsc.yourdomainatPH.ca
Obviously, you will have to replace yourdomainatPH.ca by the real name of your domain.
Step 1: Register the DNS of the Parent of the DNS of Your Domain
Open the management interface of the domain, as explained in the article How to Manage a Domain.
- In the Nameservers portion, the current name server settings are displayed:

- Notice just below the green Edit button; click on it:

- Click on the Custom radio button:
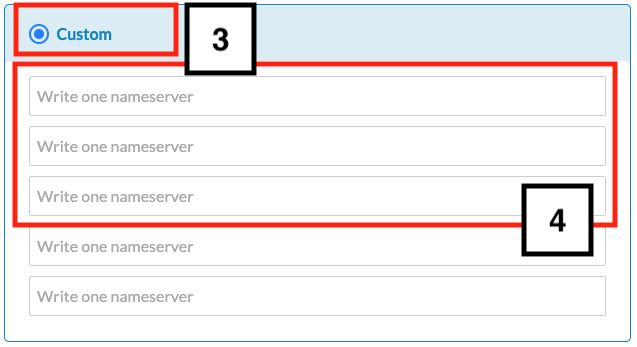
- Enter the following nameservers in the fields and click the Save button:
- Click on the Activate GlueRecords button:

- You must then enter three subdomains of your domain in the Name fields and specific IP addresses in the IPv4 fields, just like the following screenshot (use the green + icon to add them):

- Click on the Save button.
Step 2: Create DNS Entries in the Domain Account
Once the Glue Records are created, you will need to replicate them in the account where your domain is located.
Domain in an N0C Account
Add three A records with the following IP addresses (how):
| A records | IP Address |
| nsa.yourdomainatPH.ca | 209.16.158.2 |
| nsb.yourdomainatPH.ca | 85.236.159.10 |
| nsc.yourdomainatPH.ca | 185.22.111.10 |
Therefore, for the first record, as an example :

Domain With a cPanel Account
- Log in to the cPanel account where your domain is located.
- In the DOMAINS section, click on Zone Editor:

- If there is a drop-down list, select the desired domain and click on Manage.
- In the Add an A Record for “yourdomainatPH.ca” section, you must recreate the three entries:
- nsa.yourdomainatPH.ca in the Name field and 209.16.158.2 as the Adress and click on the Add an A Record button.
- nsb.yourdomainatPH.ca in the Name field and 85.236.159.10 as the Adress and click on the Add an A Record button.
- nsc.yourdomainatPH.ca in the Name field and 185.22.111.10 as the Adress and click on the Add an A Record button.

Step 3: Link your custom DNS to your dedicated server
Domain With a cPanel Account
- Log in to your reseller account and go to your WHM.
- In the search bar type the word Basic.
- Click on Basic cPanel & WHM Setup:

- Enter the name servers in the following fields:
- NameServer 1 : nsa.yourdomainatPH.ca
- NameServer 2 : nsb.yourdomainatPH.ca
- NameServer 3 : nsc.yourdomainatPH.ca

- Click on the Save Changes button.
Step 4: Change the DNS of All Your Domains
All that is left to do is to change the nameservers of all your domains purchased from PlanetHoster to :
nsa.yourdomainatPH.ca
nsb.yourdomainatPH.ca
nsc.yourdomainatPH.ca
Please refer to steps 1 and 2, as the approach is similar.