To find out about all the necessary steps for migration, please consult the article explaining how to migrate your website to PlanetHoster.
It explains that two steps depend on your current host: copying the files and copying the database onto your computer. In the following lines, we will explain these two steps in the case of a website hosted with GoDaddy.
How to Copy the Files
A copy of the files on the Godaddy service have to be downloaded to your computer. This will enable you to transfer them to your new PlanetHoster hosting via FTP.
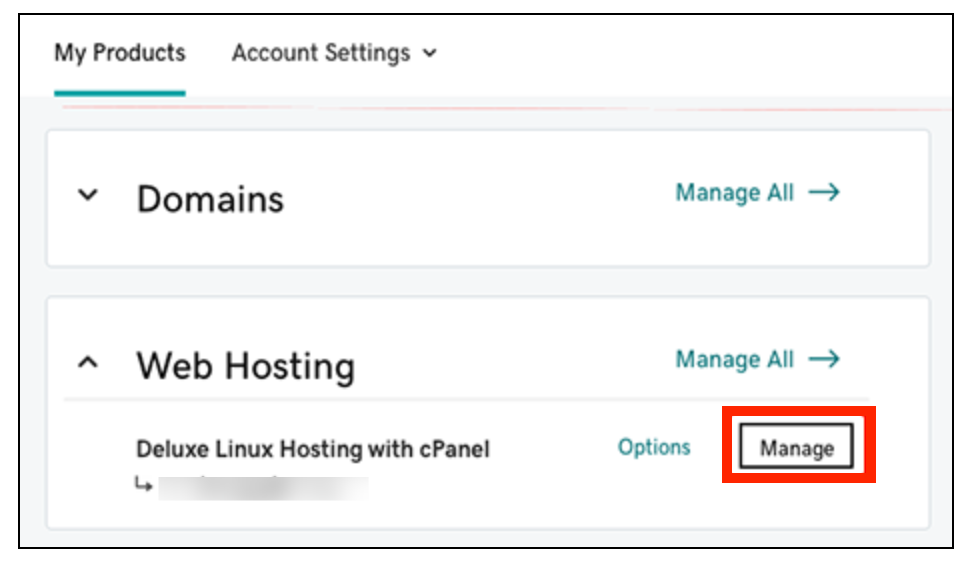
- Log in to your GoDaddy customer area and, in the My account section, go to My Products.
- Under Web Hosting click on the Manage button besides the account to use:
- Take note of the following:
- Make sure you know the password associated with this FTP or SSH user. If you do not, you will need to change it.
- Open an FTP session with FileZilla and fill in the Host, Username, Port and Password fields, then click on the Quick Connect button (please refer to the article FTP Connection with the FileZilla Software).
- Once connected, select the contents of the www root directory in the Remote site section and download it to your computer (please refer to the article How to Put my Site Online with FileZilla).
- For your main domain, it is the public_html folder.
- The root directory could be different if it is a subdomain or an addon.
When this is done, you have to copy these files via FTP to your hosting in the public_html folder for your main domain. Please refer to the article How to Migrate your Website at PlanetHoster.
How to Get your FTP User and the Server Address
To get your FTP username:
- Under Web Hosting click on the Manage button besides the account to use:
- In your account Dashboard, under Settings, select cPanel login:
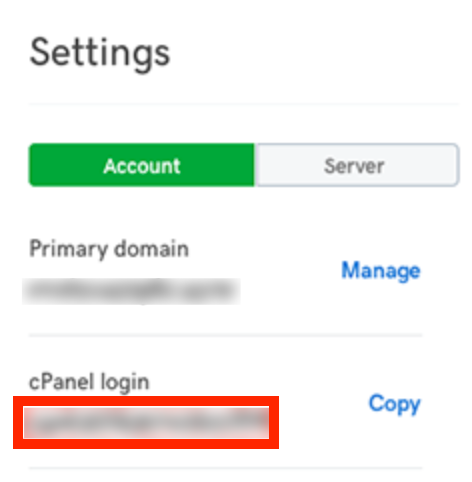
- Click on Copy and take it in note.
To obtain the server address, that is the IP address of your website :
- Under Web Hosting click on the Manage button besides the account to use:
- In your account Dashboard, under Settings, select Server:

- Note your IP address which is displayed in the list of Settings.
How to Copy the Database
In order to migrate the database to PlanetHoster, you must first create a backup file on your computer. We will show you how to do this from GoDaddy’s phpMyAdmin database manager.
Phase 1 : Access to phpMyadmin
The procedure varies according to the hosting plan you have with GoDaddy: cPanel, ManagedWordPress or Plesk.
How to Access phpMyAdmin with cPanel Hosting
- Log in to your GoDaddy customer area and, in the My Account section, go to My Products.
- On your My Products page, next to Web Hosting, select Manage All.
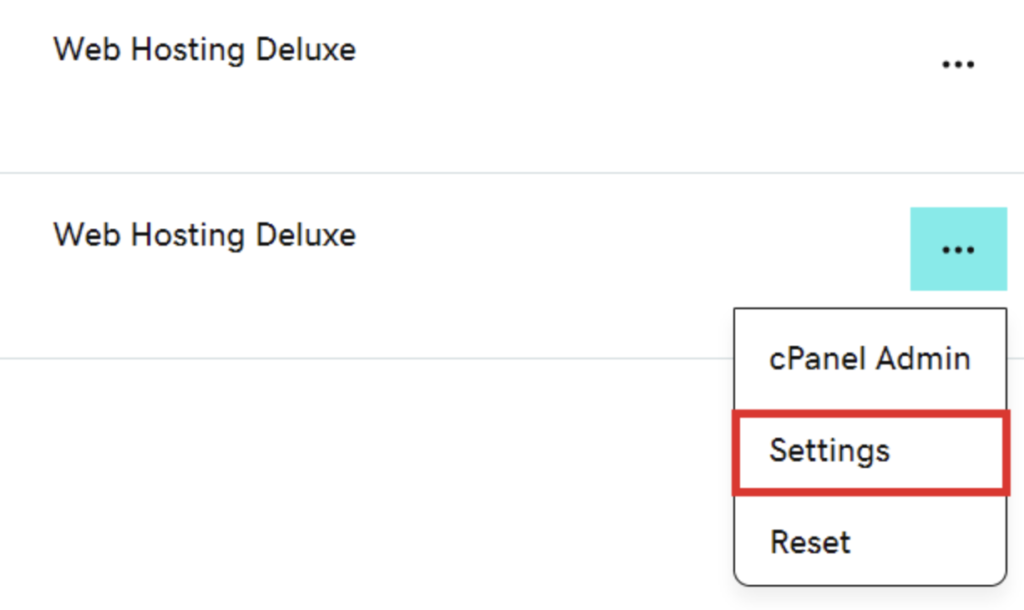
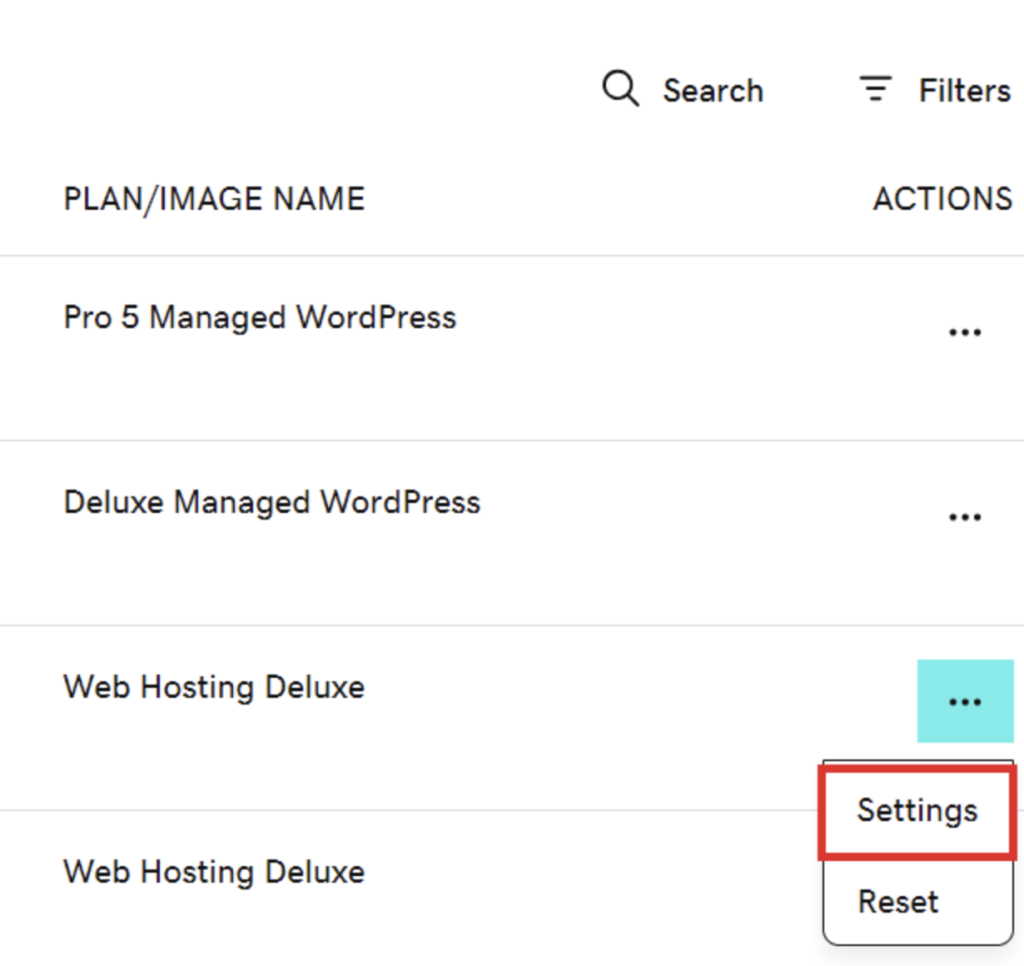
- For the website for which you wish to open phpMyAdmin, select Settings:
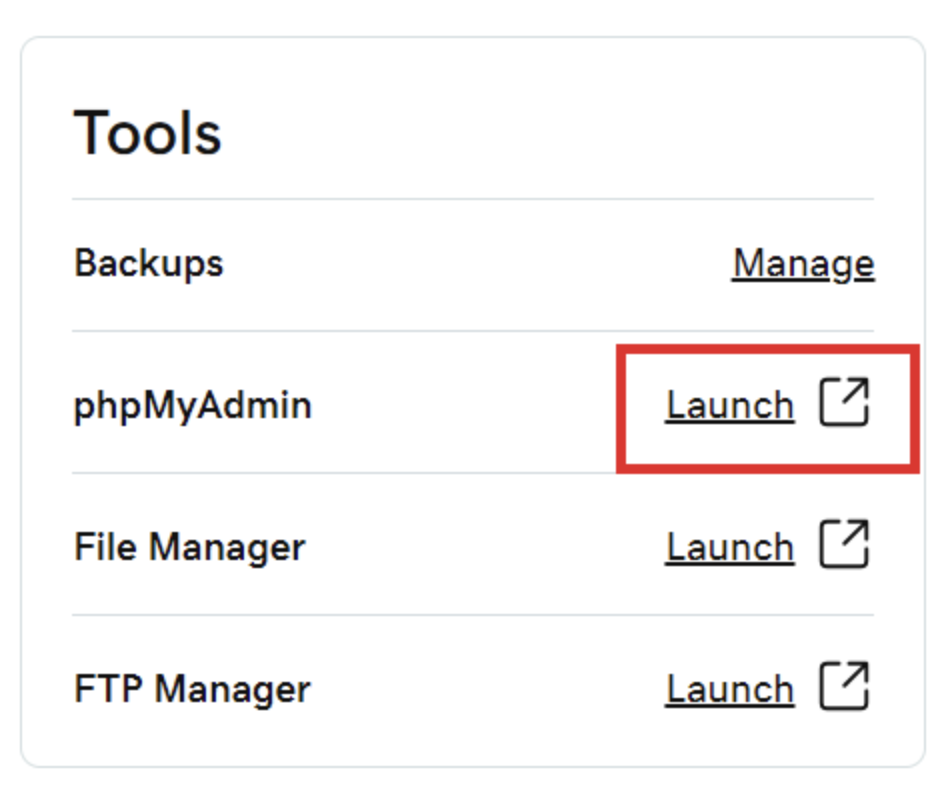
- On the right-hand side of your account Dashboard, you will find a section called Tools. Choose Launch next to phpMyAdmin:
How to Access phpMyAdmin with Managed WordPress hosting
- Log in to your GoDaddy customer area and, in the My Account section, go to My Products.
- On your My Products page, next to Managed WordPress, select Manage All.
- For the website for which you want to open phpMyAdmin, select Settings:
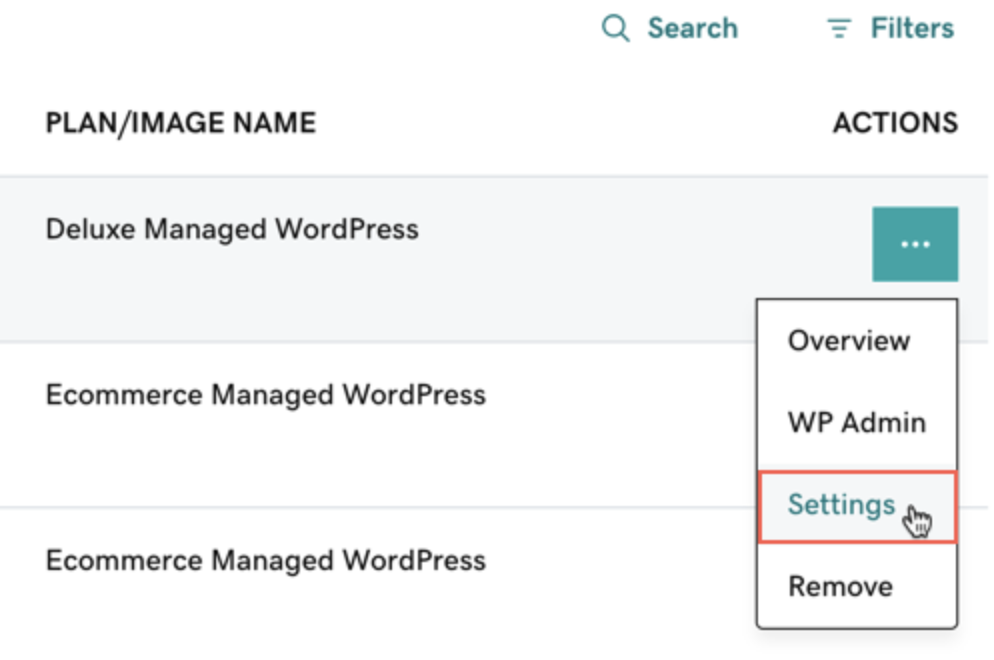
- Under Production Site, select Show more:
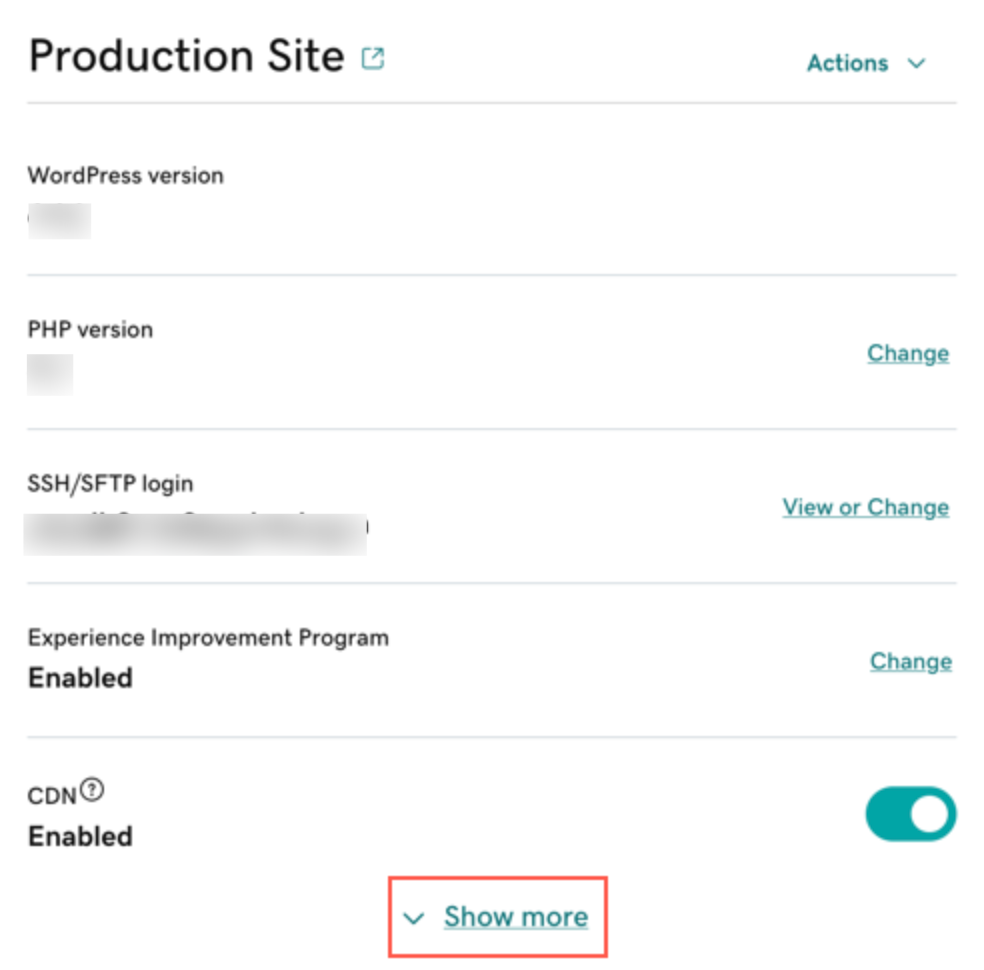
- Next to Database details, select Open phpMyAdmin:

How to Access phpMyAdmin with Plesk Hosting
- Log in to your GoDaddy customer area and, in the My Account section, go to My Products.
- On your My Products page, next to Web Hosting, select Manage All.
- For the website for which you wish to open phpMyAdmin, select Settings:
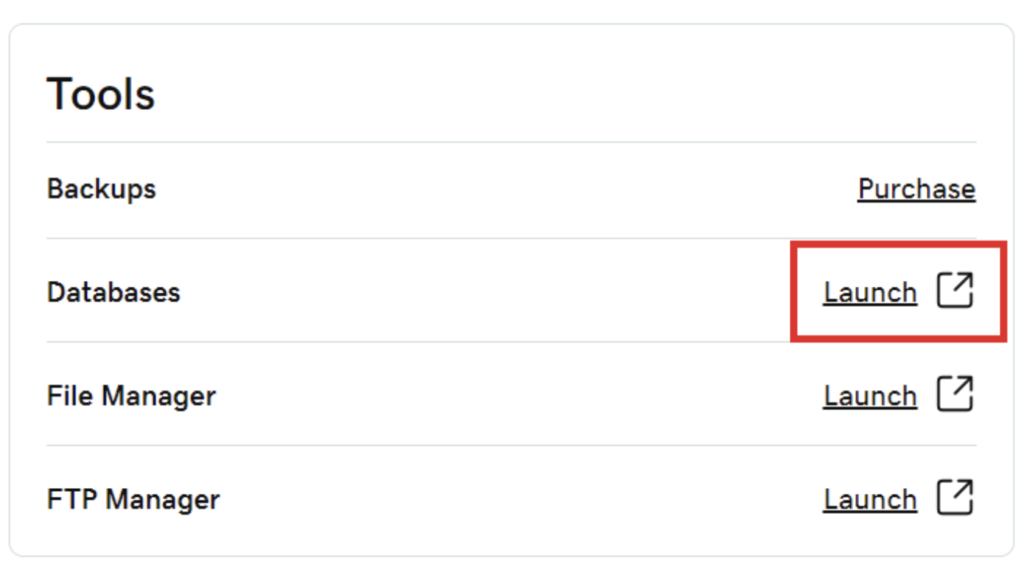
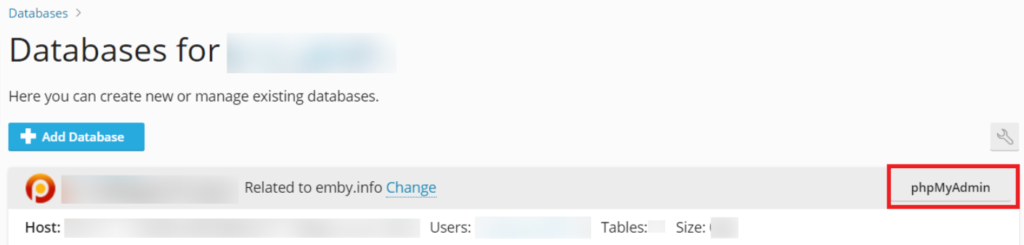
- In the Tools section of your account Dashboard, select Launch next to Databases:
- For the site you wish to manage, click on the phpMyAdmin button:
Phase 2 : Execute the Copy with phpMyadmin
After having accessed to phpMyAdmin :
- In the phpMyAdmin login interface, enter the required information. The password to be entered is that of your database (this information can be found in your website configuration file). Then click on the GO button.
- In the left-hand menu, select the database.
- A WordPress DB will look like to: 14599742_wp1.
- For Joomla, you will find a file named configuration.php.
- For PrestaShop, you would have to go in the “Config” directory to find a folder named “settings.inc.php”.
- If it is a hand-coded site, you would normally find in your script a line named define (‘DB_NAME’ […] and the name of the DB would be indicated there.
- Click on the Export tab.
- In the phpMyAdmin database export tool, choose the Quick Method export method and the SQL format, then click on the GO button.
- Your web browser will then offer you the choice of opening or saving the file. Select Save and make a note of your local download directory on your computer, as you will need this file in .SQL format for later.
You then need to create a database on your PlanetHoster hosting, import the previously exported database into this new database and, finally, modify your connection configuration files to the database of your website with the new information previously generated during the creation of the database. Please refer to the article explaining How to Migrate your Website to PlanetHoster.