Introduction
The following guide was created to help you setup Cloudflare for your Website and configure SSL connexion encryption for your visitors/Cloudflare as well as in between Cloudflare and your PlanetHoster hosting. The connexion between your visitors and CloudFlare will be encrypted by Cloudflare’s SSL and the connexion between Cloudflare and your Hosting will be encrypted by the Let’s Encrypt certificate PlanetHoster has provided you. It all boils down to creating an account at CloudFlare, adding the website to your CloudFlare account, changing the Nameservers of your domain name to those of CloudFlare, configuring the encryption so that it is SSL from one end to the other and finally the installation and configuration of the CloudFlare plugin for WordPress.
CloudFlare subscription
CloudFlare offers you CDN and anti-DDOS services free of charge for all your websites. The first step is to create an account at CloudFlare.
1- Connect to https://www.cloudflare.com/
2- At the top right, click on the “Sign up” button:

3- Once your registration request has been completed, check your email inbox. A confirmation message from CloudFlare will have been sent to you, you will need to click on the confirmation link in the latter in order to start using your CloudFlare service.
Add the website to your CloudFlare account
1- Log in to your CloudFlare account
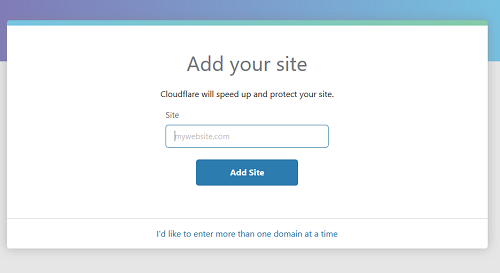
2- In your dashboard, click + Add your site
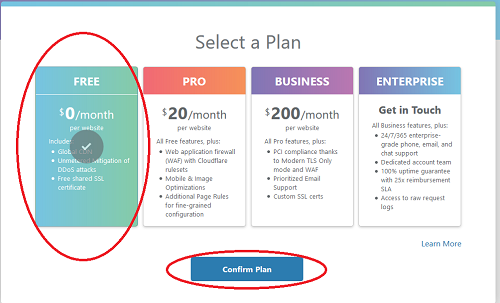
3- Then choose the desired service, the free service is very good if you want to use the Content Delivery Network (CDN) as well as CloudFlare anti-DDOS protection.
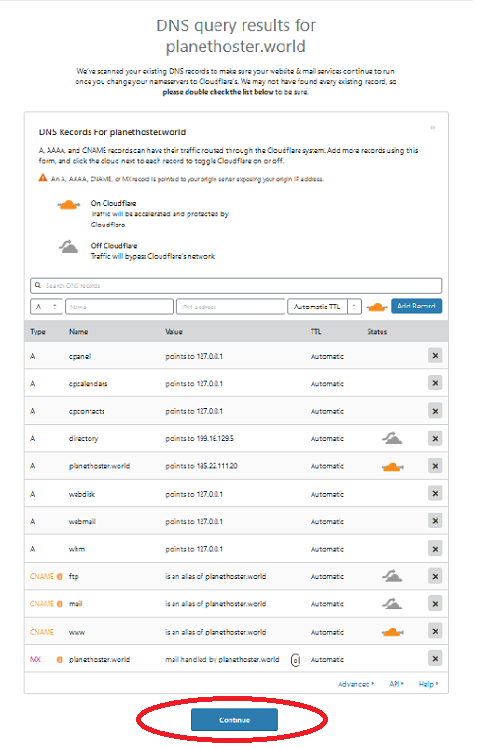
4-CloudFlare will then scan the website to find the DNS zone currently in use, make sure the entries match with what you have in your real DNS zone and then click the continue button:
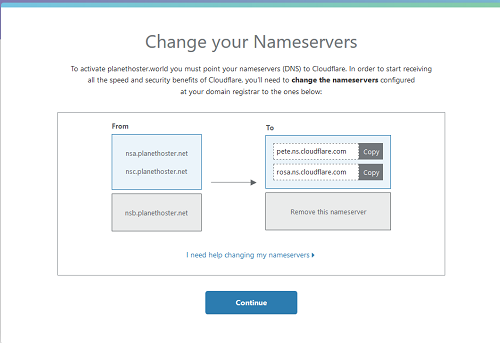
Change the nameservers of your domain name
You have now successfully added your site to your CloudFlare account. This section will walk you through the update of NameServers for your domain name with those of CloudFlare required to take advantage of CloudFlare.
In the next step, CloudFlare indicates the Nameservers to set up:
If your domain is registered at PlanetHoster, you can follow the instructions in this article to put the NS CloudFlare in place: Change the DNS of a Domain Name.
If your domain name is not registered at PlanetHoster you can check with the technical support of your actual registrar how to apply the new Nameservers or perhaps even consider transferring it with PlanetHoster.com? Our support team is always glad to assist you very quickly!
Changing Nameservers for your domain name may take up to 24 hours to spread completely! After that, your CloudFlare service is activated successfully!
Configure CloudFlare SSL mode to use Let’s Encrypt between CloudFlare and PlanetHoster
Congratulations! Your site is now protected with CloudFlare, but there still needs to adjust the SSL configuration. By default, CloudFlare will have installed a valid SSL certificate that covers the link between your site visitors and CloudFlare, but the connection between CloudFlare and your PlanetHoster Host will not. For that, we will have to go ahead and set up the righteous SSL mode in our Cloudflare Dashboard.
1- In your CloudFlare Dashboard, click on the option named “Crypto”:

2- You will find the SSL configured by default to “Flexible” this option ensures that the connection between CloudFlare and your visitors is secure but not the connection between CloudFlare and your PlanetHoster hosting, To correct this, adjust the SSL option to Full or Full (strict).
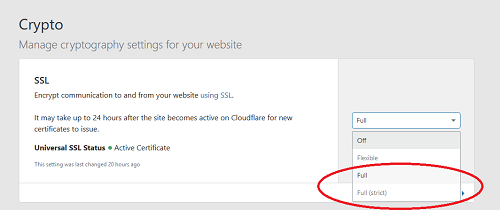
3- That’s it! There is no “save” button in this interface, changes are applied as soon as you order them from the drop-down menu! After that, please allow 24 hours so that Full mode (Full or Full) is taken into account and that the connection between CloudFlare and your PlanetHoster hosting is also encrypted by the Let’s Encrypt! certificate.
CloudFlare plugin configuration for WordPress
A convenient plugin allows you to manage the essential functions of CloudFlare directly from your WordPress Dashboard. Its implementation will be detailed in the following section:
1- Log in to your CloudFlare dashboard >>> Overview:

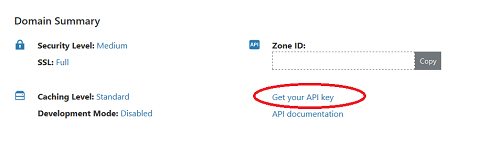
2- Under the section named “Domain Summary”, click on “Get your API key”:
3- You are now in the “My Profile” page, at the bottom of this page you will be able to display the API key by clicking on the “View” button. Take note of this key as we will need it to configure the CloudFlare WordPress plugin:
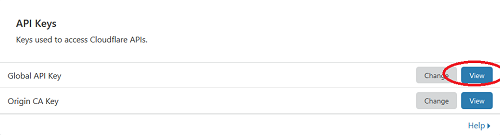
Then you have to authenticate to display the API key
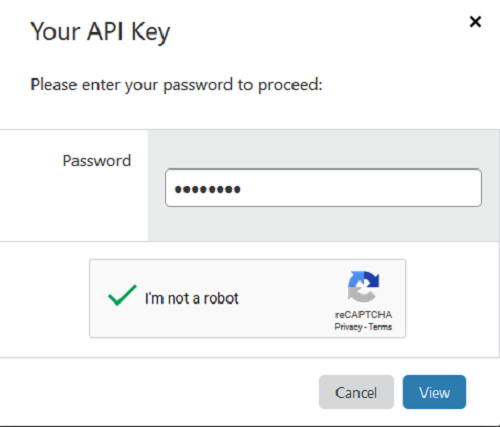
Please note the API key somewhere in order to move to the next step
4- Go to your WordPress dashboard in the section called Plugins >> Add New and search the term CloudFlare
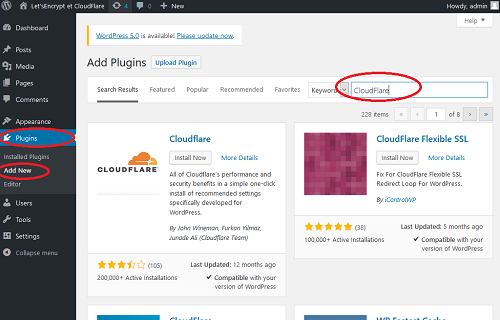
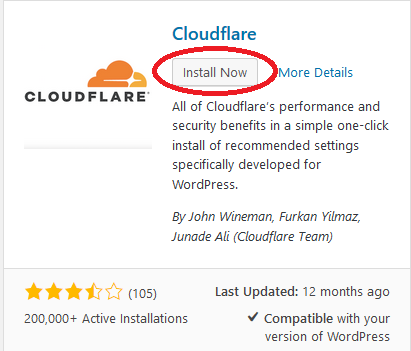
5- The results of your search appear, Cloudflare will appear first, click on the install button to install it:
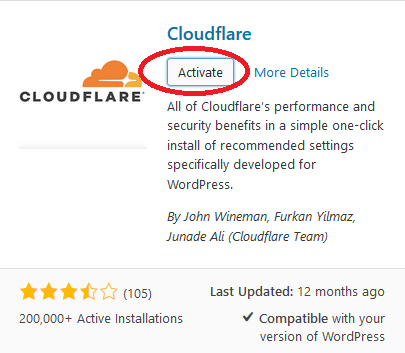
6- Once the installation is complete, click on the Activate button to activate the plugin:
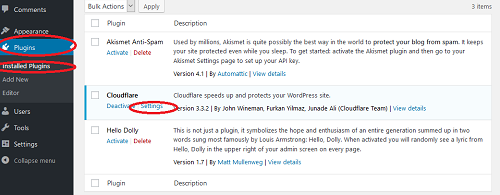
7- Now that the CloudFlare extension is active we have to go and set up the API key that we took note in step 3. To do that, go to the dashboard >> Plugins >> installed plugins on the line corresponding to Cloudflare, click Settings:
8- You are now on the configuration page of the CloudFlare module which invites us to connect, here you have to connect with the information used to log in at CloudFlare:
Click Have an account already? Sign in here:
Enter your Email and the API key
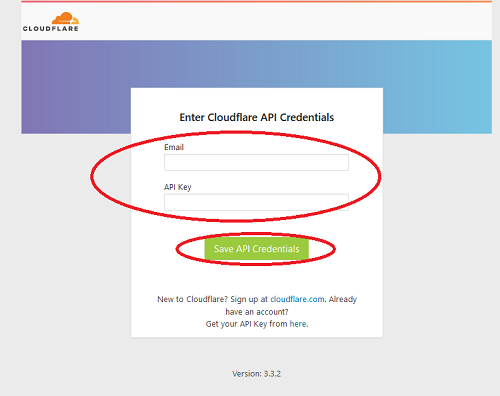
Click Save API Credentials to continue setting up the Cloudflare module
9- Congratulations! CloudFlare has now been successfully activated and you have configured it with the SSL encrypted connection between the visitor and Cloudflare and between Cloudflare and PlanetHoster with the Let’s Encrypt certificate of your site in Full SSL mode.
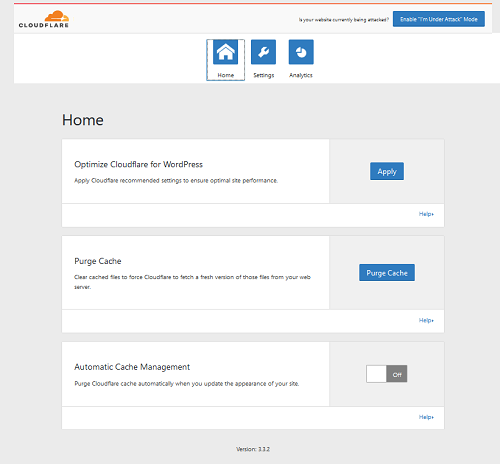
In your WordPress dashboard >> Installed Extensions >> Cloudflare >>> Settings you will have several convenient options like the Anti-DDOS mode shortcut, a button to purge the Cloudflare cache and many more advanced settings: