In this article, we describe the detailed information associated with each Web Project. This information is centralized in a user-friendly interface. You can also perform various operations using this interface.
Prerequisites
Enter the following address in your web browser: https://my.planethoster.com.
Access to Web Project Details
Go to My Hostings -> My Web Projects.
- Whether you are viewing the table view or the detailed view, the process is the same. Please click on the main domain name of the Web Project whose details you want to view:


- Web Project details are then displayed :

In the following sections, we will explain the meaning of each piece of information displayed, as well as the commands that can be executed using this interface.
Web Project Information
In the top-left corner, we find the Web Project Information:

| Main Domain | Primary domain name associated with the Web Project. |
| Creation Date | Date the Web Project was created. |
| Offer | World or HybridCloud. |
| Control panel | N0C (or cPanel). |
| Performance Mode | Standard, Plus or Ultra. |
| Server IP | IP address of the server. |
| Localization | Country where are the hosting servers. |
| DNS | The three PlanetHoster DNS server names for The World service with N0C (or cPanel servers, as appropriate). DNS management is done with the control panel. |
| Temporary URL | Temporary website address, which can be generated using the button of the same name. For details, see the section on Generating a Temporary URL. |
Generating a Temporary URL
The temporary URL tool is designed to make your life easier and boost your productivity.
As the name suggests, this solution allows you to create a temporary URL for testing a website before it goes live or while waiting for DNS propagation after your domain name has been activated.
- Click on the Generate button. A temporary URL will then be generated and displayed. No further action is required.

- You can always delete it by clicking on the Delete button.

You can test your hosting right away in your browser using the temporary URL.
Subpages on CMS platforms like WordPress may redirect you to the main domain. To avoid this, we recommend editing the hosts file until you’ve updated your site’s DNS settings (see the article “How to Edit Your Local Hosts File”).
It is possible that the subpages of CMS like WordPress redirect you to the main domain name. In order to avoid this, we advise you to modify the hosts file while waiting to put your site in production at the DNS level (please refer to the article How to modify your OS’ “hosts” file).
Migrating a cPanel Hosting Platform to N0C
To migrate a cPanel hosting platform to N0C, click the Migrate to N0C button that appears in the Web Project Information section and confirm the migration at the command prompt.
Upgrade
Checking the Health of Your DNS Zone
By clicking the ns-lookup button in the top-left corner, you will be redirected to a free tool (DNS Zone) that allows you to check the health of the DNS zone:

Instructions on how to use this tool are provided in the article NS-Lookup.
Whois Domain Ownership Verification
By clicking the Whois button in the top-left corner, you will be redirected to a free tool that allows you to confirm that your domain name is indeed listed in the Whois database:

Using the following interface, just type the domain name in the Whois field, validate the reCAPTCHA by checking the box I am not a robot and press the Enter key of your keyboard:
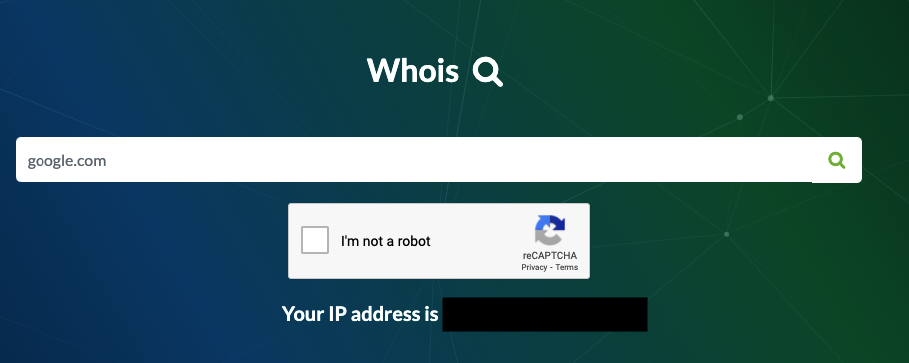
When you do this, a message confirming that your domain is not available confirms that it is indeed listed in the Whois database.
RDAP
The RDAP button opens RDAP Lookup:

The Registration Data Access Protocol (RDAP) allows users to access current registration data and was designed to eventually replace the WHOIS protocol.

Project Health
This information is displayed in the upper-right corner of the interface:

| Status | Indicates whether the Web Project hosting is Active or Suspended. |
| Performance | Indicates whether the web project has been migrated from Apache to LiteSpeed; if so, performance will be optimal. |
| Backups | Indicates whether backups in N0C are active or not. |
Suspending or Reactivating Web Project Hosting
If you wish, you can suspend the Web Project hosting by clicking the Suspend button, or, if it is already suspended, reactivate it by clicking the Activate button. After that, simply follow the steps outlined in the article “How to Suspend Web Project Hosting and Reactivate Suspended Hosting.”


Deleting a Web Project
To delete an active Web Project, click the Delete button. The Web Project must first be suspended:

Login Info
This information is on the right side of the screen:

| User | Username. |
| “Copy password” icon | By clicking on this icon, the password for logging into the hosting account is saved and can be copied later. |
| Login | For N0C platforms, the N0C button provides direct access to the MG control panel. Otherwise, the cPanel, Backups and SiteBuilder buttons allow you to connect to the desired interfaces. |

Change Web Project Login Password
To change the password for the Web Project:
- Click on the Change Password button:

- Provide the new Password and click on Save:

| Icon to show or hide the password entered in the field. | |
| Icon indicating whether the password is secure enough (closed padlock on green background) or not (open padlock on red background). | |
| Icon for randomly generating a secure password. | |
| Icon allowing to copy the password. It is kept in memory and can be transcribed elsewhere by the “paste” function (CTRL + V in Windows). |
Special case for HybridCloud with cPanel
Please refer to the article How to Change the Root Server Password with the AutoResetPassword (ARP)? for detailed explanations.
sFTP/SSH Access
This information is at the bottom right of the screen:

| Server name | Name of the server hosting the Web Project. |
| Username | User name to use for an sFTP or SSH connection. |
| Password | When you click this icon, the password for remotely logging into the Web Project is saved; you can copy it later. |
| Port | This information varies depending on your hosting plan. Therefore, use 5022 for HybridCloud / World N0C plans and 2908 for HybridCloud/World cPanel plans. |
| Login | The SSH button is used on Mac and some Linux distributions to access the terminal . All you have to do is respond to the command prompt. |
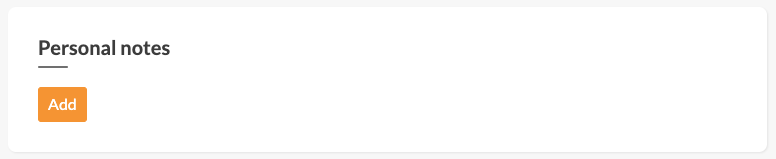
Personal Notes
The Add button at the bottom right of the screen lets you create personal notes:
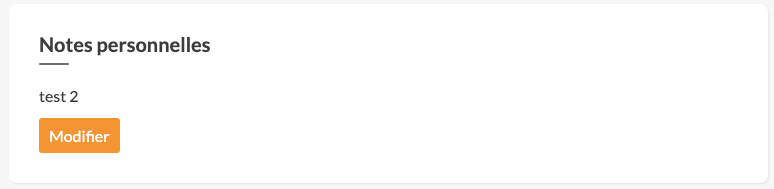
Notes can be modified and even deleted using the Modify button:

Resources
At the bottom left of the interface, the Resources are displayed, like in this example for a The World account:

| CPU | Number of microprocessor cores allocated to the Web Project. |
| Memory | RAM in GB allocated to the Web Project. |
| Disk I/O | Hard disk access speed. Number of I/O operations, measured in MB/s (when running a combination of read and write tests) allocated to the Web Project. |
| Disk Space | Memory available for the Web Project in GB (HybridCloud). |
The modification of the resources of the Web Project is done in a window accessible by clicking on the button Modify. After that, simply follow the instructions in the article explaining How to Manage Resources in a World or How to Manage Resources in a HybridCloud.