Introduction
In this article, we explain how to connect a PlanetHoster domain to a Squarespace site.
With this connection method, Squarespace hosts your DNS, while your domain remains registered with its current registrar, in this case PlanetHoster.
References
If you need more information during your reading, please refer to the following articles: PlanetHoster documentation:
Prerequisites
- Go to: https://mg.n0c.com/en/.
- Go to: https://my.planethoster.com.
- Go to your Squarespace account.
- Change your account and site language as per this article.
Connecting your Domain to Your Squarespace Site
The following procedure is in accordance with the instructions explained in the Squarespace Help Center. If needed, you can consult the documentation here.
Step 1 — Start the Connection in Squarespace
1. Open the HOME menu in Squarespace and click on Settings > Domains:

2. Click on USE A DOMAIN I OWN:

3. Enter the domain to connect and click on the arrow:

4. Click on Connect Domain:

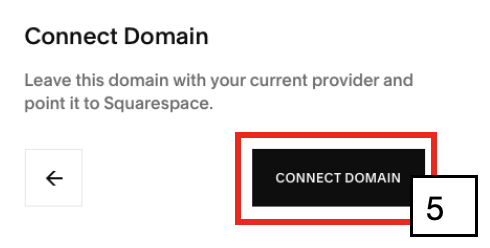
5. Select Other from the supplier drop-down list and click on the CONNECT DOMAIN button:
6. Click on the CONTINUE button:

Note: If you see a message that says the domain is already connected to another Squarespace site, find where the domain is connected and then disconnect it from that site.
Step 2 — Note Your DNS Parameters
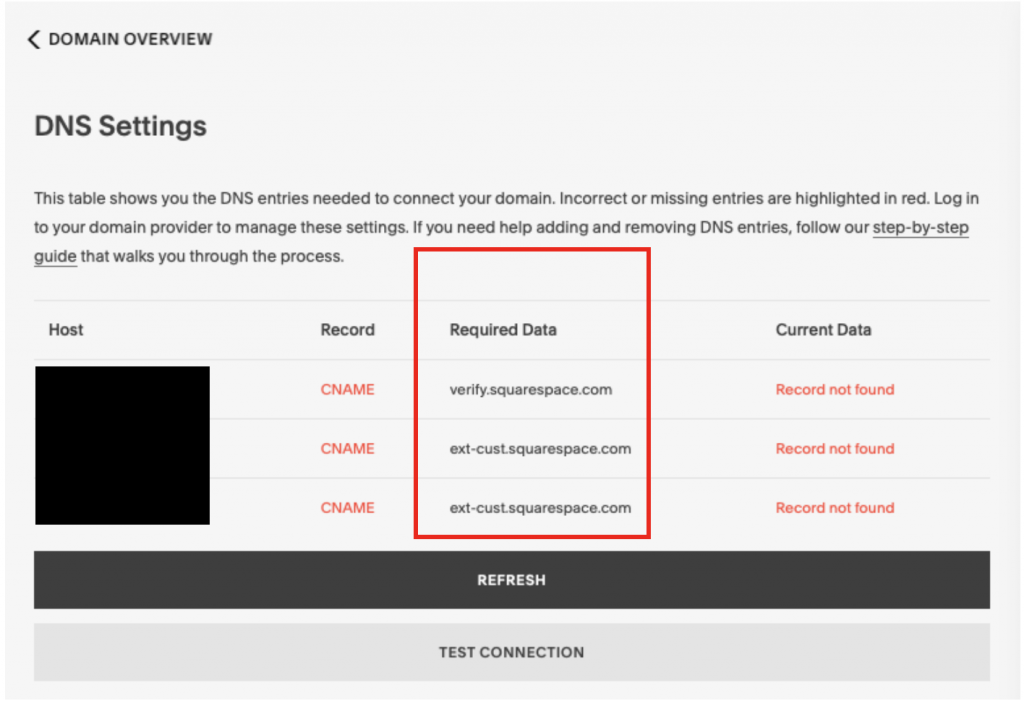
After connecting Squarespace to your domain, a new panel opens with records that you need to enter in your PlanetHoster account for the reverse operation, that is, connect your domain to Squarespace.
Creating records is necessary in order for your Squarespace site to be properly linked to your PlanetHoster domain.
The records are listed in the Required Data column:
Keep this panel open for reference. If you close it and need to access your DNS settings again, open Domains in the Settings panel. Then click on your third-party domain name.
Your domain records may be green or red, depending on what Squarespace “sees” from PlanetHoster. The problematic Current Data is shown in red under the column with the same name:

Step 3 – Log in to Your Domain Account
The following procedure applies to a N0C account.
1. Enter the following address in your web browser and log in to your PlanetHoster domain that you want to link to Squarespace: https://mg.n0c.com/en/.
2. In N0C, choose Domains > Domain Management.
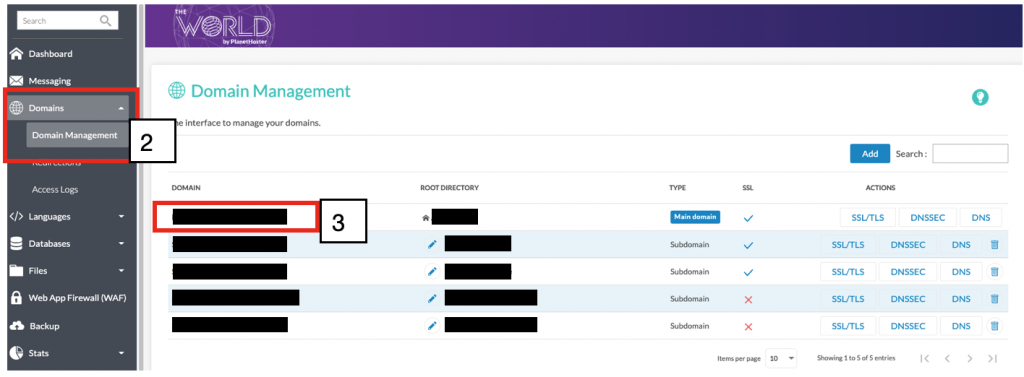
3. Locate the domain to which you want to link your site.
4. Click on the DNS button for that domain:

Note: Do not delete the MX records during the rest of the process. MX records link your email address. Deleting them could interfere with your email service.
Step 4 – Add the First CNAME Record
A unique code of a CNAME record appears directly on the first line of your Squarespace DNS settings under the Host column.
The unique code is a random string of numbers and letters that must point to verify.squarespace.com. Here’s how to do it:
1. Select and copy the unique code:

2. In the PlanetHoster DNS manager, create a new CNAME:

3. Enter “verify.squarespace.com” in the NAME field.
4. Copy the unique (host) code into the VALUE field.
5. Click on the Create record button.
Note: If you do not add this CNAME, or if it is entered incorrectly, the domain will be unlinked from your site after 15 days. If this happens, you can start over to reconnect the domain.
Step 5 – Add the Second CNAME Record
The CNAME whose name starts with www must point to “ext-cust.squarespace.com“.
1. Locate your “www” CNAME record and click on the Modify icon:
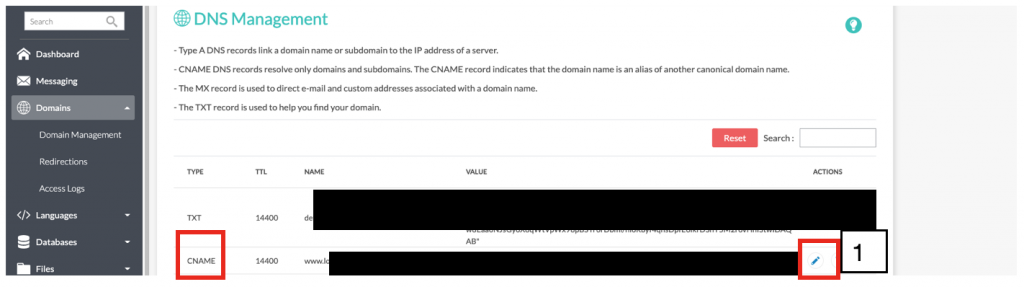
2. Replace your “www” CNAME record so that it leads to “ext-cust.squarespace.com“:

3. Click on the Save icon.
Note: If you have problems adding this record, add an A record with the following details instead:
– Alias or hostname: www
– « Points To » or details: 198.185.159.144
Step 6 – Add the A Records
If you already have some A records in place, change them with the hostname @, so that they point to the values below:
- 198.185.159.144
- 198.185.159.145
- 198.49.23.144
- 198.49.23.145
1. To do this, for each A record, click on the Modify icon:

2. Enter the four IP addresses of each A record (don’t forget to click on the Save icon so as not to lose your changes):

Step 7 – Refresh the DNS Parameters
In Squarespace, click on the Refresh button:

Note: The data will not be updated (green colour) immediately. Proceed immediately to the next step.
Step 8 – Wait Until the Connection is Complete
Confirm that your PlanetHoster domain redirects to the main Squarespace domain. To do this, simply click on the domain name at PlanetHoster and make sure your Squarespace website opens right away.
It may take 24 to 72 hours for the connection to start working properly. While you wait:
- You can go back to your Squarespace DNS settings, click Refresh under the records, and the Current Data column will begin to show if your records are entered correctly. When the domain is successfully linked, it will appear in the DOMAIN NAMES panel with a « connected » label.
- Wait for your SSL certificate to be generated. You may see privacy error messages on your domain. These messages are normal while the domain is connecting. When the connection is complete, the SSL certificate is generated and the errors disappear.
- It is normal to see errors in the DOMAIN NAMES panel or when visiting your domain for up to 72 hours after performing the steps previously explained. If you see error messages after 72 hours, see the section Troubleshoot with the DNS record checker section.
Troubleshoot with the DNS Record Checker
If Squarespace detects that your records were not set up properly, your domain will appear in the DOMAINS panel with the message “Could not verify domain ownership“.
Most of the time, a typographical error explains the error.
1. In Squarespace, click on DNS SETTINGS :

2. Note the data required for the incorrect records:

3. In the PlanetHoster DNS Management window, locate each incorrect record and click on the Modify icon to make the required corrections:
