Introduction
The purpose of this article is to explain the procedure for obtaining a .aero domain with PlanetHoster, an approved .aero registrar.
A few words about .aero domains and SITA
Only members of the civil aviation community may register a .aero domain.
The .aero TLD is the world’s first industry top-level Internet domain. This TLD is driving a revolution in the way people access and use air travel information. The .aero TLD was developed in response to the growing needs of the civil aviation community, and is designed to create a structured, open, and evolving Internet terminology architecture to help this community integrate systems and services and streamline communications within the community and with its partners.
The organization that validates the .aero domain names is called the Société Internationale de Télécommunications Aéronautiques (SITA). It is based in Geneva, Switzerland. You can write to this organization via the following e-mail address aero.enquiries@sita.aero.
Prerequisites
login to client area by clicking on the following address: https://my.planethoster.com/.
Enter the following address in your web browser: https://information.aero/.
Step 1 : Check your Eligibility
Check your eligibility to register an .aero domain name and the format in which you can create it.
- Enter https://information.aero/registration/eligibility in your web browser and read the information provided to confirm which Registrant group your organization belongs to:

- Take note of the domain name format suggested, as well as recommendations for this.
- Choose a domain name with the .aero extension for your organization.
Step 2 : Verify if your Chosen Domain Name is Available
You need to make sure that the domain name you have chosen does not already exist:
- After logging in to https://information.aero/, go to Check Name:

- Provide required information:
- Enter the domain you want to get in the field (without the .aero extension).
- Read the terms and conditions of use and confirm that you accept them by checking the Accept Terms and Conditions box.
- Click on the go! button.
- Confirm that the words Domain not found are displayed (it confirms the domain is available):

Step 3 : Obtain your “Membership ID” and “Auth Code”
You are now able to fill out a form that will allow the SITA to verify if you are an eligible member of the aviation community. If so, you will get a “.Membership ID” and a “Auth Code”.
- Click on the green APPLY NOW button to open the form (also available at https://information.aero/node/add/request-aero-id) and fill in all the information requested:

- Click the Save button at the bottom of the form when you are finished.
- After analysis, SITA will send your “Membership ID” and “Auth Code” by e-mail.
- Make sure to keep them as soon as you will receive the email, because they will be needed for registering your .aero domain.
Step 4 : Register the Domain at PlanetHoster
After you received from SITA your “Membership ID” and your “Auth Code“, register the chosen domain name through your registrar, PlanetHoster.
To do this, login to client area by clicking on the following address: https://my.planethoster.com/. Then:
- Register your .aero domain name, as explained in the article How to Register and Transfer Multiple Domains to PlanetHoster.
- Go to the Domains Configuration page by clicking on the red circle when it appears in the upper right corner:

- Click on setup now for the .aero domain:

- Provide all the information requested in the Account settings window:

- Get the “Membership ID” and “Auth Code” you received from SITA.
- At the bottom of the window, enter the “Membership ID” in the Aero Id field and the “Auth Code” in the Aero password field:
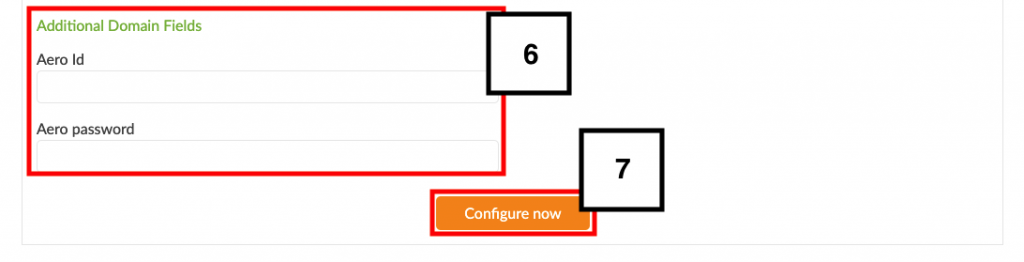
- Click on the Configure now button.